
I’m going to show you how to make these:
When I moved into my (furnished) house, for some reason, it came without a coffee table. Something had to be done. Unfortunately, my living room is a bit cozy, so I needed to minimise the floor space that any table would take up. Enter: the nest of tables. Small, about the right height, and can double in area when we’re entertaining. Perfect!
Tutorial after the jump…
You will need:
- Tables
- Annie Sloan Chalk Paint in Old White
- Annie Sloan Chalk Paint in Louis Blue (a tester pot is more than enough)
- Annie Sloan Clear Wax
- The design you want, printed out as a silhouette at the size you want
- Pritt Stick
- Stencil Paper
- Sandpaper – fine, but possibly coarse too
Tools
- Decorator’s paintbrush
- Small Stanley knife
- The smallest, finest artist’s paintbrush you can lay your hands on
- Propelling pencil
- Lint free cloth, for rubbing in the wax
I bought the tables from my local branch of Emmaus (they’re an awesome charity that operates across the UK) for £7. They were black, laminate, and generally not very pretty at all, but they were cheap!

I was using Annie Sloan Chalk Paint in Old White (it was left over from this project). Theoretically, it shouldn’t need any prepping other than making sure that it was clean, grease and dust free. However, I got a bit nervous, so I scored it with some coarse sandpaper.
Then, I started painting.

They definitely needed two coats of paint! Here they are after two coats

Now for the design! I couldn’t find a stencil that I liked, so I decided to make my own. I bought some stencil card from my local art shop (£2 for a large sheet) and printed off the design that I wanted from the internet. I then pritt sticked the design onto the card, and used a small Stanley knife to cut out along the lines. This took a while, and is quite fiddly but entirely achievable. This was the end result. I cut the two corners off because it made it easier to keep it aligned.

Then, I started penciling in the designs, using a propelling pencil as it gives a sharp tip. I was using a tester pot of Annie Sloan Chalk Paint in Louis Blue for the design, but it’s far too sloppy to paint straight through a stencil, hence the need to draw the design on in pencil first.
I did a few at a time (to avoid my hand smudging it when I started painting) and made sure that they were aligned with each other, and that the designs ran off the edge of the table.

Then, I started painting! You’ll need the smallest artist’s paintbrush that you can find – and it needs to be smaller than you think! Each stencil took about half an hour to paint on.

 Apologies about the dodgy lighting! It’s definitely a white background and pale blue design.
One down, one to go. The table then needed waxing. This is really important because the paint is water based, and this was to be a coffee table. I paid extra attention to (i.e. waxed several times) the top of the table, which I knew would receive a lot of use and abuse.

At this point, I knew that I wanted to distress it a little bit, so I got some fine grain sandpaper and used it on a few areas, especially along the edges and legs. I then rewaxed where I had distressed it a bit.

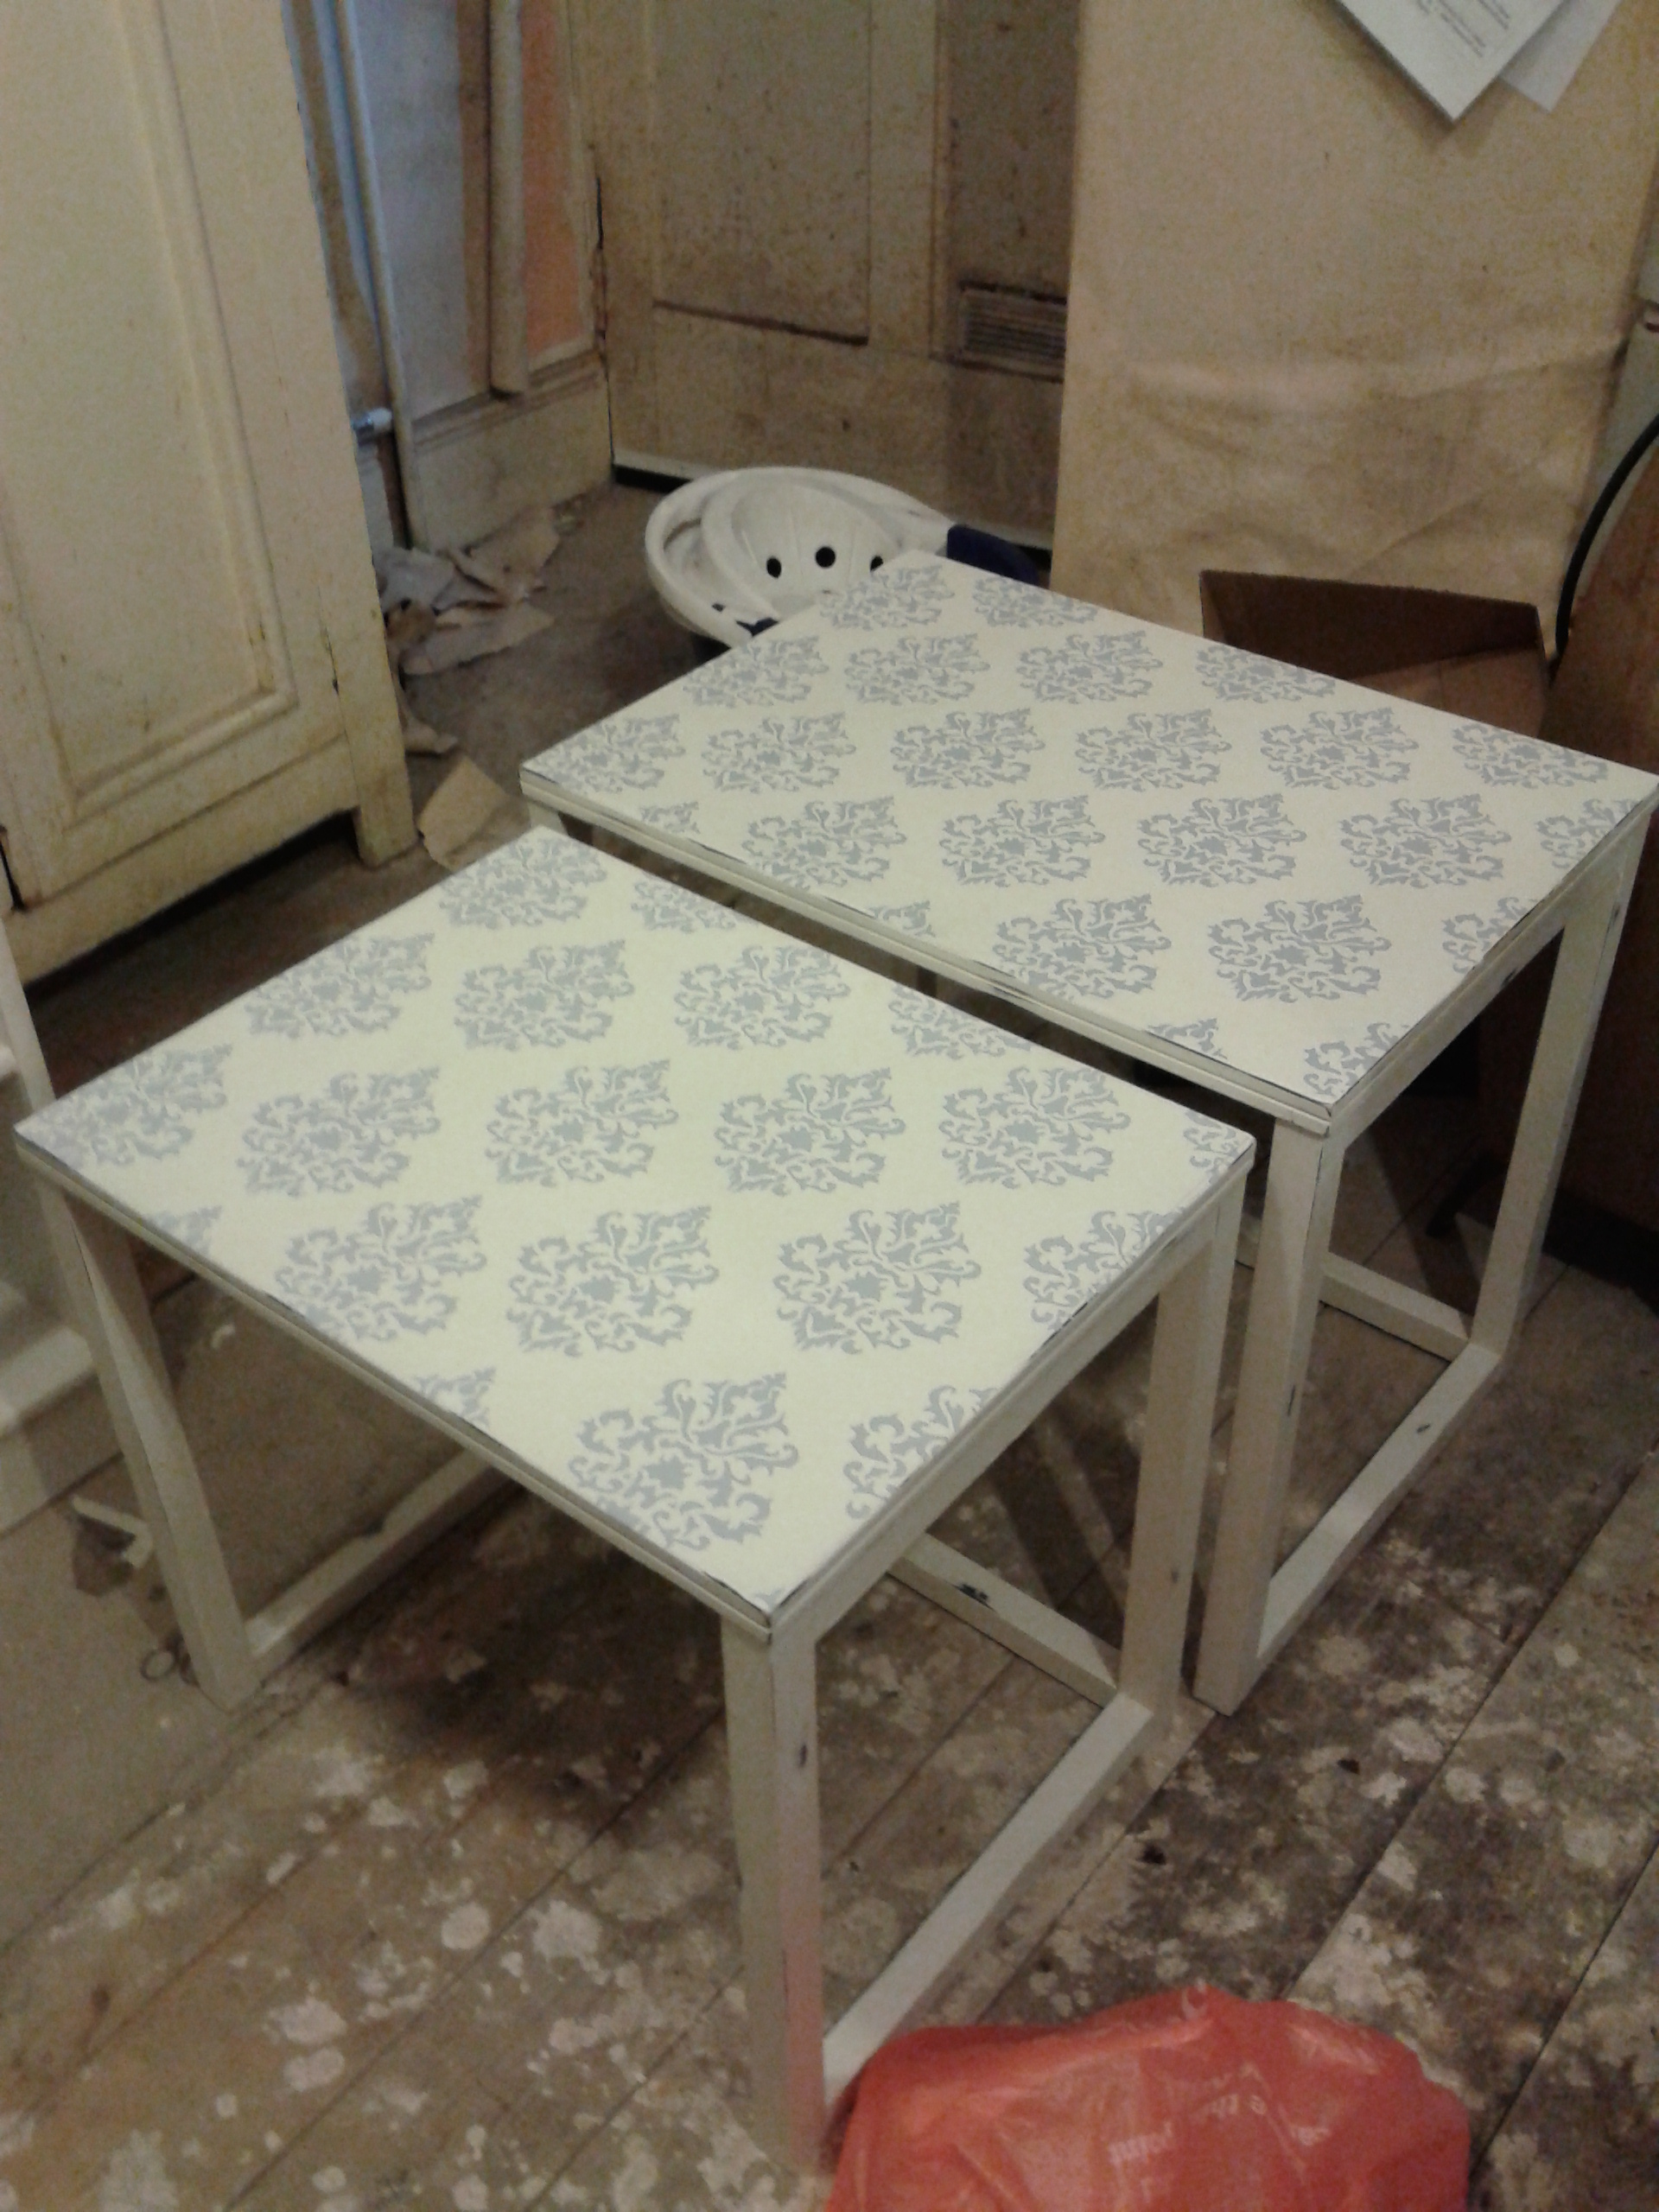
The other table was then done in exactly the same way. Here they are together, finished!
And like the shelves, the tables made their way into advertising tech to students


Omg!!!
Is this hand painted and stenciled? Incredible.
And I looooooove that lilac and white.
Thank you! Yep, it’s 100% hand stencilled and painted. I had quite a bit of time on my hands over the summer when I completed this project!
It looks incredible! And I def didn’t expect it to be hand painted!